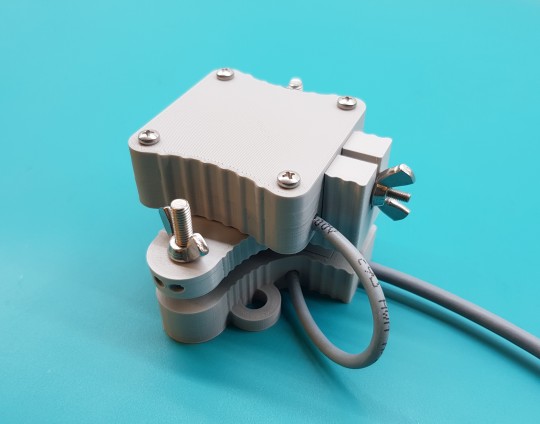
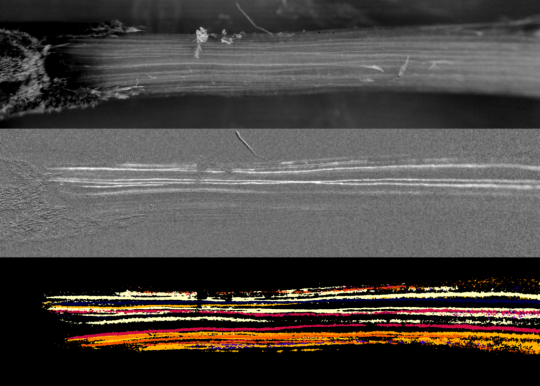
The latest version of CaviCapture – the command line python script that orchestrates image capture and light control on the raspberry pi – is significantly different from V1, and not only includes a new script for automatically processing the images (CaviProcess.py) (for more info see https://github.com/OpenSourceOV/cavicapture) but also simplifies configuration and is geared for integrating into other systems/processes, such as creating your own GUI.
Integrating the control and configuration of cavicapture with an external process was a key goal of cavicapture v2 and was essential for the development of the Caviconsole GUI (for more info, see the caviconsole github repo). The aim of this article is to provide an overview of the setup and the steps you need to take to integrate image capture and processing it into your own custom processes or GUI.
Overview
There are four key components:
- Cavicapture.py – command line python script that controls the image capture sequence i.e. controls the lights and stores pictures from the camera
- Caviprocess.py – command line python script that processes the images captured using cavicapture.py
- INI configuration file – all settings for image capture and processing are stored in a simple text-based INI configuration file
- capture.db – a SQLite database that keeps a record of the images captured, images processed and the results of processing.
Controlling image capture and processing settings
Both cavicapture.py and caviprocess.py take all their settings from the same INI configuration file. An example configuration file can be found in the repo. To start image capture or processing all we do is pass the location of the configuration file to the script:
python cavicapture.py --config /home/pi/cavicapture/example_config.ini
and
python caviprocess.py --config /home/pi/cavicapture/example_config.ini
The config file can be anywhere and named anything – just as long as it contains the settings!
python caviprocess.py --config /home/pi/Desktop/unicorns.ini
An external configuration file makes it very easy to create a GUI that controls the settings. Most, if not all, programming languages can parse and edit text files, so all you have to do is get the user to provide the location of the ini file, parse the file and then use whatever controls you want to modify the settings and then write the new settings back to the file. Caviconsole uses the nodejs ini package, but in python you can use the configparser library, in C the inih library and in Ruby the inifile gem but there are many others.
Image capture and processing queues and displaying results
Okay, so now you want to see what files have been captured, what files are queued for processing or have been processed, and what the results of processing are. In Caviconsole the Results tab provides this information and displays a graph of embolism areas and tells you how many files still remain to be processed. This information all comes from the SQLite database stored in the file captures.db.
As with ini configuration files just about every programming language can access and query a SQLite database (e.g. python’s SQLite3 library and node.js SQLite3 package). You can even connect SQLite to Matlab and there are a number of GUIs for viewing the data e.g. https://sqlitebrowser.org/. All you need to access the data is the location and name of the file.
The database schema is very simple – just one table: ‘captures’, and it has seven columns:
- id (integer) – unique ID for the capture
- filename (string) – the name of the file that stores the captured image
- timestamp (string) – the date and time the image was captured
- skip (integer – either 1 or 0) – whether to skip the image when processing
- processed (integer -either 1 or 0) whether the file has been processed (1) by caviprocess or not (0)
- processing (integer – either 1 or 0) – whether the file is currently processing (1) or waiting to be processed (0)
- area (real/float) – the result of processing. This is what’s plotted on the graph.
Simple! So if you’re building a GUI and want to plot all the results you might run a SQL query like:
SELECT id, filename, area FROM captures WHERE processed=1 ORDER BY timestamp ASC
Checkout the SQLIte docs for more information about SQLite databases and the SQL query language. Also, most GUIs have an export function so you can export the data from the captures table without having to write any SQL.
Stopping and starting image capture and processing
To initiate or stop image capture and/or processing you just need to call the cavicapture.py and caviprocess.py scripts independently and pass in the location of the configuration file (as outlined above). Again, most programming languages have a method for calling terminal scripts (e.g. via python’s subprocess library or Ruby’s exec command).
Bringing it together
- Use an INI configuration parser library (for whatever programming language you want to use) to control the settings.
- From your GUI or process call the cavicapture.py and caviprocess.py scripts and pass in the location of the INI config file.
- Plot results or display the queue status by connecting to the SQLIte capture.db file and querying the records in the captures table.
- For more information see the cavicapture instructions.
Advanced Integration
If you want a more advanced integration using python, then you’ll be pleased to know that the image capture and image processing functionality have been nicely wrapped up in classes (CaviProcess and CaviCapture) that you can import into your own script e.g.
from cavicapture import CaviCapture
...
cavi_capture = CaviCapture(path_to_config_file.ini)
cavi_capture.start() or cavi_capture.generate_preview()
For more information see the cavicapture.py and caviprocess.py files.
Lastly
If you happen to create a super cool whizz-bang user interface for capturing, processing or visualising the data captured using the opensourceov cavicam, consider giving back to the community and sharing it on Github!

